Symptoms
- Tapes will be listed as “Suspect”
- DPM will not be able to write to these tapes
Troubleshooting
One of the first indication that this was not a legitimate error was that i was seeing this on 7 brand new tapes
Another giveaway was that they were labeled this way after a Fast Inventory, which means that they have never entered the drive to be read or written on

Resolution 1
Change the label on the tape.
For me, everything in the 50 range was being marked as suspect. e.g. 450-459, 550-559.
This is not a very good fix but will allow the tapes to be written on should you be hesitant to try anything else
Resolution 2
Open the DPM Shell and enter the following
osql -E -S localhost\MSDPM2012 -d DPMDB -Q “UPDATE tbl_MM_ArchiveMedia SET IsSuspect = 0”
This command will modify the SQL table and change all tapes to non-suspect

WARNING: if you have any tapes that are legitimately suspect this will also change them so use with caution
Resolution 3
This method will allow you to individually mark tapes as not suspect, but can be quite time consuming
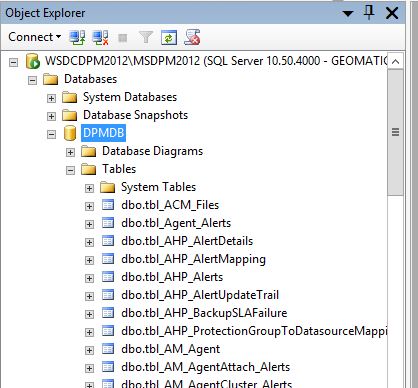
Open Microsoft SQL Server Management Studio
Navigate to Server Instance > Databases > DPMDB > Tables

Right click on dbo.tbl_MM_ArchiveMedia and click “Edit Top 200 Rows”. should you have more than 200 tapes you can easily expand the amount of rows in the right pane under “Top Specification”, change it to No

To Identify which tape is which, run a query on the database (DPMDB) and match MediaID to the edit tab
select [BarcodeValue], [MediaID]
FROM [DPMDB].[dbo].[tbl_MM_Media]
Once the correct row is identified change the column marked “IsSuspect” to 0
Note: i am working on a PowerShell script that will make this process easier, but time has been tight and this will be a good starting point for most people